Home About The Fame! Contact

Friday 15 November 2013

Maple Spice Chocolate Roll Cake with Caramelised Nuts

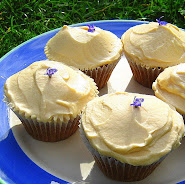
Possibly the best recipe ever to be posted on Delicious Delicious Delicious...

So, several weeks ago, our friends Lucy and Rich asked us over for dinner. They have a toddler and I never know how they manage to get him bathed and in bed, cook a three course meal and host dinner in a lovely clean house for all of us on a Wednesday evening, but somehow they consistently manage. I suppose it's possible that they lock the little one up in a cage upstairs, tired and dirty, but if that is what they do, they won't be able to get away with it for much longer because he's going to start talking soon. Therefore, new tactics might prove necessary in coming months.

I confess that I ate quite a lot of these and had to caramalise more. Sue me.

Anyway, last time we went round, the pudding was hands down the best thing we've eaten for ages - a spiced pumpkin and caramelised pecan pie, with maple syrup whipped cream. I am going to say that last part again, in case you missed it, and also because it gives me great pleasure: maple syrup whipped cream.

I haven't been the same person since, and knew without a doubt last week that I had to come up with some kind of cake (I'm no pie guy) that would make this maple and spice combination the star of the show. I am quite excited to present this bad boy, the result of my efforts, to you all for your approval.

I have rather lazily simplified the whole spice fandango, unlike the pie Rich made: there'll be no fine grating of nutmegs for this beauty. I noticed in Miami that lots of shops were selling 'pumpkin pie spice'; we don't get that here, so I opted for Schwartz's  'mixed spice', which has a little bit of everything you want in it. This made me feel really nostalgic, because my Mum's spice rack was always full of those cute little spice bottles, with their distinctive shape and lids.


I also seem to remember she always had celery salt in plentiful supply. I'm wondering as I type this if she was a secret Bloody Mary drinker the whole time? It would explain a great deal.

Anyway, I hope you try this. The spiced chocolate and nuts go so well with the maple whipped cream that it would be a pity if you never found it in you to whisk a few egg whites. If you can't be bothered with the rolling, simply bake the mixture in a 20cm greased and lined deep-sided tin for around 25 minutes, and when cool, frost with the whipped cream and top with the nuts. For me, it's the Swiss roll, every time.

Maple Spice Chocolate Roll Cake with Caramelised Nuts

You will need:

35g cocoa plus a little extra for dusting
1 tsp vanilla

2 tsp Schwartz mixed spice
30g unsalte
d butter
60ml boiling water
135g sugar
6 eggs, separated
  

A generous handful of pecans and walnuts
50ml maple syrup

250ml double cream
125ml maple syrup

  1. Pre-heat the oven to (you guessed it!) 180°C. Cut a generous piece of baking parchment (you want some overhang at the edges, to assist in rolling later), grease it well and lay it on a regular sized shallow sided baking tray. Mine measures 45cm by 30cm, so that's what I mean by 'regular'. You can make this as a round cake too - see above.
  2. Put the cocoa, vanilla, mixed spice, butter and boiling water into a small bowl and stir until the butter has melted and you have a thick, brown cream. Set aside for a moment.
  3. Beat the egg yolks and around half the sugar until creamy, pale and thick. This will take around three to five minutes with a regular hand whisk, a little less if you use machinery. It's your choice, and we're all friends here, so don't think I'll judge you for pulling out the stand mixer.
  4. Whisk the egg whites in another, large bowl. When they start to froth, start adding the remaining sugar gradually, continuing to whisk until they reach the stiff peaks stage.
  5. Now, we amalgamate. Add the cocoa slurry to the yolk mixture; stir until well mixed. Then fold the egg whites into the chocolatey egg yolks. Fold gently and keep at it until there are no streaks of white left and all is chocolate brown in colour. Pour the mixture onto the parchment-lined tray, spread it out using a spatula, and bake for just under twenty minutes. It will be light and springy when done.
  6. Wet a clean tea towel and ring it out well. Take the cake out of the oven and, leaving it in the pan, place it on a cooling rack to cool. Sprinkle a little cocoa powder evenly all over the cake and cover with the damp dish towel. Allow to cool completely.
  7. Meanwhile, toast the nuts in a dry pan, over a low flame. Just warm them through, stirring often. When nicely toasted (don't let them burn!), add the 50ml maple syrup and stir to coat them as it heats up. Turn them out to cool onto a piece of baking parchment and then chop them into small chunks.
  8. Whip the cream until softly peaking; add the syrup and whip just a little more. Then, remove the tea towel from the cake and spread the cocoa dusted sponge with the maple cream. Sprinkle with the chopped nuts. 
  9. Gently roll up the cake, using the parchment to lift, peeling it away as you go. This is much easier than it sounds so do not be scared as the cake is very flexible. This will keep in the fridge for at least three days. Serve generously in thick slices.Yum!

Thursday 7 November 2013

Zest + River Cottage, Cardiff Marriott

Parsley Salad, with Crab, Soft Boiled Egg and Garlic Mayonnaise

Shock horror: I am going to do a restaurant review.

I get a lot of promotional emails through my blog, usually asking me to review things. I tend to ignore them, since I have had a few annoying experiences in the past when PR types try and control what I write and get angry when I write what I want to anyway. I have never done restaurants on here, largely because in the main I find blogger restaurant reviews so unbearably cringe-inducing to read (everybody starts talking about how well-excecuted the dishes were - blurgh!) and I assume my readers feel the same way I do. So this review isn't going to be like that.

I have made no secret of my adoration for Hugh Fearnley-Whittingstall on these pages. I love the man. His River Cottage team have been working with Marriott Hotels to develop new, sustainable ways to serve diners at the hotel chain's restaurants, and Cardiff is one of two pilot hotels trialing the scheme. The emphasis is on local (within a 60-mile radius) suppliers and producers, seasonal menus that change daily and organic produce. I know that doesn't sound like the sort of thing you'd find at a hotel restaurant (and believe me, I stay in enough hotels to know that!), so you'll just have to take my word for it when I tell you it is really happening. And, if it works well in Cardiff, the new restaurant format is going to be rolled out nationally, bringing the taste and ethos of River Cottage to Marriott customers all over the UK.

Percy. Oh, and Pollock with Red Cabbage, Apple and Horseradish.
Rainbow Carrots and Potato Gratin with Anchovies and Fennel.

I am suitably impressed to want to share this with you. But rather than give you a (yawn!), blow by blow account of the meal we enjoyed, I think I'll instead just focus on the core areas that matter to me as a customer.

Service

Well, after all, I do work in the service industry. It makes sense to start here.

I don't know how to say this without sounding really down on Cardiff, but the staff were wonderful. I don't think I have ever eaten at a restaurant in this city where the employees were friendlier and more polite, or as knowledgable about what they were serving. It really reminded me of the actual River Cottage Canteen in Axminster: Caroline, our server, took time to explain to us where the ingredients in each dish came from and recommend side dishes to complement our choices, based on what seasonings and flavours were dominant in the main courses we ordered. She really knew the menu and it was obvious that the team care and are enthusiastic about the new concept.

Venison. Yum.

Food

I have to say that it was really difficult to choose from the menu, because each dish had at least one gorgeous sounding seasonal ingredient. There were five or six different options for each course to choose from, and a definite simple, fresh feel to everything. Brilliantly, and in true River Cottage style, fish and seafood was well represented. I had a crab and parsley salad to start (which I shall be recreating at home!), and pollock and mussels were on the main course list. Hugh has spent years trying to raise awareness about over-fishing and championing pollock as a delicious alternative to cod, so it was good to see it on the menu (and our plates).

Our mains were delicious - we had lamb and fish - but I think you alway expect that in a restaurant. What really made us want to go back to Zest were the starters and puddings. I already mentioned my salad; Percy chose cold venison with crisp fried garlic and mushrooms. It was beautiful and a truly appetising way to start a meal. Caroline also told us that the restaurant now bakes all their own bread and brought us some salt topped focaccia to nibble on between courses, with organic Calon Wen butter.

I remember the desserts at River Cottage Canteen were lovely: simple and uncomplicated, but just treaty enough to be impossible to turn down. They're the same at Zest! We chose panna cotta (that was nicer than mine, boo!) with apricots and biscotti, and sticky date pudding with homemade ice cream. They were lovely. I'll be telling everyone about them for weeks!

Panna Cotta.


Local suppliers

I shall be honest: this is something I like to know about and would choose a restaurant because of. I find it so irksome that in Wales, where we have the best lamb in the world, so much of what you see in the supermarkets comes from New Zealand. How does that make financial sense? It's ridiculous.

At Zest, the lamb and pork comes from Slade Farm, just down the road in Bridgend. The fish comes from Cardiff Market (less than five minutes walk from the restaurant) and the vegetables are from Wales too. I can't tell you exactly where from, since I have forgotten, but Caroline will be able to let you know, I am sure. Nothing is imported from far-flung corners of the globe, and if the chef can't get something because it isn't in season and at market, the menu gets changed.


Sticky Date Pudding and Homemade Vanilla Ice Cream.

I thoroughly recommend a visit, and am hoping that Marriott adopts this concept in all of its hotels. I can't tell you how many times I have been exhausted after long flights and had to force myself, begrudgingly, to leave the hotel to get dinner when I am away on trips. If all hotel restaurants were this good, I wouldn't have to.

Disclosure: We were the guests of the Cardiff Marriott hotel and as such our meal was complimentary. However, we are already planning to go back!

Wednesday 30 October 2013

Sugared Coconut Rum Bundt Cake

Bundt cake again. I love them.

Before we went to Miami for our recent holiday, Percy came home one day from work one evening and told me that he was hosting a meeting for a group of planners and needed me to make a cake for it.

I'll not lie to you: my first thought was why on Earth did that cursed careers advisor tell me to study Japanese when I was fifteen and not instruct me to focus on gaining employment in local government? I mean, not once, not even a single time in any job I have ever had has anybody brought home made cake to a meeting for me and my colleagues to eat, or to be honest, referred to the action of holding a meeting as 'hosting'. I felt very hard done to, I must say.

Still, I put aside my immense sadness and asked why I had to bake a cake that I wasn't even going to get a slice of, for loads of people I had never even met. And I'll tell you what, the answer was a good one.

'Well, you don't have to if you don't have time. But it's an after work meeting which people from other authorities are coming to, we're holding it in our own time on Friday night and there isn't a budget for catering or to cover anyone's travel costs. I bought some tea and coffee but wanted to put on a bit of food. Your cakes are better than anything in the shops. I really care about the project and I want to make a good impression.'

I know you all think I have a heart of stone. But it really got me. I'm married to one of those people who loves what they do and thinks it's worth doing things to the best of your ability. I'd have made ten cakes if he'd wanted!

Also, I must say that I love the fact that my sugar and butter-fuelled baking obsession has now reached what might be labelled a useful skill set. I can use it to do favours for people. Which is a very nice feeling indeed. (They don't know it's all the work of the KitchenAid!)

So. Flattered by P's praise and flushed with the recent Lemon Bliss Bundt Cake success, I tweaked the recipe and came up with this, the Sugared Coconut Rum Bundt Cake. It's rather amazing. I know that for a fact because I did actually find a small piece made its way home to me after all. Wrapped in a rather fifties looking peach coloured paper napkin. He wasn't lying about there not being a budget!

This cake is buttery, rich and moist. The coconut adds texture, and with the rum glaze, makes it one of the most satisfyingly tropical tasting recipes I have ever experienced. Well worth having a go.


Sugared Coconut Rum Bundt Cake

You will need:

225g unsalted butter, softened
400g sugar
1 teaspoon salt
4 large eggs
2 teaspoons baking powder
300g plain flour
225ml milk
100g dessicated coconut

60ml white rum (I used Malibu. Yum.)
150g sugar


  1. Preheat the oven to 180°C. Lightly grease a 25cm tube pan, or a 2.4 litre capacity bundt-style pan. Nordic Ware bundts are all this size, so if you have one of them, you're good to go.
  2. Cream together the butter, sugar, and salt.
  3. Add the eggs one at a time, beating really well after each addition. It helps prevent curdling if they are at room temperature, though since I keep eggs outside of the fridge, mine always are.
  4. Mix the baking powder with the flour. Add this dry mix alternately with the milk, in thirds, starting and ending with flour. Mix until smooth. Stir in the dessicated coconut.
  5. Spoon the batter into the prepared pan, smoothing the top with a spatula.
  6. Bake the cake for about an hour, or until a cake tester inserted into the centre comes out clean.
  7. While the cake is baking, make the glaze by stirring together the rum and sugar. 
  8. Remove the cake from the oven, and set it on a rack. After 10 minutes, run a knife around the edge of the tin to loosen the cake, and turn the it out onto the rack.
  9. Poke the hot cake all over with a cake tester or toothpick to create holes for the glaze to sink into.
  10. Stir the glaze, and immediately brush it on the hot cake a little at a time, continuing until all the glaze is used.

Tuesday 22 October 2013

Lemon Bliss Bundt Cake

 The glaze makes my eyes glaze over... Beautiful. Edible. Perfect.

For once, I have so many things waiting to be posted on here that I can hardly bear it. I am super tempted to post out of order as the birthday cake I made for Perce yesterday is just so ridiculously lovely to look at that I feel very strongly the need to show it to you all, but I am going to refrain. If you can't wait, Instagram is your friend. Spoiler: it's pumpkin.

I was on holiday until just the other day in Miami (and surrounds, though sadly I didn't make it to The Everglades, thanks to the US shutdown). I have to say, up front, though I probably will save details for coming posts, that it was probably the best few weeks I have had all year. Right up until we left, I didn't particularly want to go, which might not be the most positive way into this, but it's the truth.

I had zero interest in Florida and felt that once again I was being pushed into going somewhere that Percy wanted to visit. I figured it would just be beaches and people who have better bodies than I do.

Note that I said bodies and not swimwear. I have hot neon orange short shorts with gold toggles (amazing) and pineapple emblazoned black equally short shorts to choose from. I must thank my sister for making sure I bought both pairs of them and thus making that choice possible. (She likes to shop.)

But yes, sadly, I don't consider myself to be hot enough for South Beach. It's OK though, since as a married man, there's only one person I need to impress and I can do that with cake back home in Britain*.

The thing I can't do with cake at home is recreate the gorgeous Art Deco buildings of SoBe (I've gone native). I think that, weather, ceviche and well made martinis aside, it was the Art Deco that appealed to me the most in Miami. I wasn't expecting it. Truly, to walk around Ocean Drive and Collins Avenue, and peek into the different hotel lobbies, is to take a stroll though a land of fantasy, glamour and pastels. It is unforgettable. You just have to ignore some of the bar touts and music during happy hour.

I wish I had taken more photos.

This is getting too long. I shall be back soon with more.

*This is an appropriate statement: this bundt is baked in the tin I bought on honeymoon with the plan to use it every wedding anniversary. This is the second time I have used it for that purpose. (Though it gets used a lot more often than that!)

Lemon Bliss Bundt Cake (adapted from King Arthur Flour)

You will need:

225g unsalted butter, softened
400g sugar
1 teaspoon salt
4 large eggs
2 teaspoons baking powder
350g plain flour
225ml milk
finely grated zest of 2 lemons

freshly squeezed lemon juice from the 2 lemons
150g sugar

  1. Preheat the oven to 180°C. Lightly grease a 25cm tube pan, or a 2.4 litre capacity bundt-style pan. Nordic Ware bundts are all this size, so if you have one of them, you're good to go.
  2. Cream together the butter, sugar, and salt.
  3. Add the eggs one at a time, beating really well after each addition. It helps prevent curdling if they are at room temperature, though since I keep eggs outside of the fridge, mine always are.
  4. Mix the baking powder with the flour. Add this dry mix alternately with the milk, in thirds, starting and ending with flour. Mix until smooth. Stir in the grated lemon zest.
  5. Spoon the batter into the prepared pan, smoothing the top with a spatula.
  6. Bake the cake for about an hour, or until a cake tester inserted into the centre comes out clean.
  7. While the cake is baking, make the glaze by stirring together the lemon juice and sugar. 
  8. Remove the cake from the oven, and set it on a rack. After 10 minutes, run a knife around the edge of the tin to loosen the cake, and turn the it out onto the rack.
  9. Poke the hot cake all over with a cake tester or toothpick to create holes for the glaze to sink into.
  10. Stir the glaze, and immediately brush it on the hot cake a little at a time, continuing until all the glaze is used.

Thursday 26 September 2013

Blackcurrant Mousse


Devastatingly, it is no longer blackcurrant season, but I know that most people would substitute blueberries or the currently appearing in the brambles near you blackberry anyway, so I don't feel the need to apologise for once again not posting particularly often or promptly.

Anyway, this week, I have baked twice and even made dilly beans à la FIJ, so know that there will be joy to come in the near future.

OK, the mousse.

I was at a loss as to what to make with the blackcurrants we picked this August in The Gower, because let's face it, when life gives you blackcurrants, most people just send them on to the Ribena factory (delicious!). But I'm different. I make stuff up.

(Just like a few days ago when I came home from work, tired, tearful and smelling of the Economy Class cabin on a 777-300ER, to find a wild rabbit and over priced pesto in the fridge from Mr. Other P's (not called him that in a while!) food festival frolics. Hello rabbit in mustard and cream sauce.)

I don't know if we can really use the word mousse here. I think, technically, this is a fruit flavoured whipped ganache. But really. Let's not over complicate. There's no need. We'll just make dessert.


I quite like making purple food. The colour always makes me think of Prince. And my friend Lucy (she of the purple batik), but Prince first. This blackcurrant mousse is not quite what I expect the inside of Paisley Park looks like, but rather a delicate take on Angel Delight. All good here, thanks.

If you want to make this and are subbing the above mentioned berries, I would just purée them, raw, and add sugar to taste. The blackcurrants, should you have some, need cooking. To get this amount, simmer about 300g or so of them with a little water and a few tablespoons of sugar (it's impossible to be exact here: you might have sweeter currants than the sour little bitches I pulled off those bushes), then push the resulting purple-blue-black mixture through a sieve.

Blackcurrant Mousse

You will need:

250ml blackcurrant purée
200g white chocolate
300ml double cream

  1. Melt the chocolate. Set aside to cool.
  2. Whip the cream. Fold a little into the chocolate, just to lighten it, then add the rest. Fold in the purée.
  3. Divide amongst glasses and chill until set: I got six out of this. I guess if you have larger glasses, you'll get less.

Friday 30 August 2013

Yogurt Pot Cake

 instagram.com/peterdelicious - follow for more yum


I did something the other day that I am a tad worried about and I think I might need to talk about it here with you. Ideally, some people who know about eyes and contact lenses will be searching for a yogurt pot cake recipe and therefore read this; if that describes you, I implore you to comment.

There's a long story and a short story, but since I always yell at Perce for favouring the long story option, I feel a very real and pressing need to choose the short version to share with you so as not to have to wear the hypocrite jumper. Which is a shame in some ways because the padded out version includes nudity and casual racism (neither of which were mine!), which I know lots of people enjoy.

Basically I dropped a contact lens on the floor of a dirty bus. Oh, and I didn't realise this until after about twenty minutes had passed. It was pretty dry when I did actually find it, covered in fluff and awful. Having no choice but to try and salvage it, I picked it back up and did what I think most people would do in my shoes: I soaked it in mineral water (it's all I had), gave it a quick rinse and popped it right back in to my eye.

I know that this is a no-no on many levels. I also need to tell you that the lens was a little misshapen afterwards and that I carried on wearing it for more than a week.

Internet Eye Specialists: am I going to go blind or something? Please tell me not.

I have worried greatly about this.

Anyway, to the matter in hand. I have about ten minutes to finish, which is actually longer than it takes to make this cake, so if that actually interests anyone, brilliant.

It's a yogurt cake, similar to my bizcocho recipe (which I prefer, and comes up on the front page when you Google 'bizcocho' so I can't be the only one who likes it), and is basically lifted from Nigella Lawson's Nigellissima: Instant Italian Inspiration. I was intrigued as to what her version would taste like. It's good, but not as good as my 4 egg Spanish yogurt cake. Just being honest here people.

However, I do want to take a moment to tell you that the cookbook this comes from is awesome. I didn't really 'get' the TV show that accompanies the book when I saw it on telly. I thought it seemed tacky and inauthentic. But glancing through the printed version recently in a shop, I realised that she's not actually trying to be authentically Italian with these recipes, they're really just inspired by her love of Italy. More to the point, they all look delicious. So I bought it. I think I am going to go as far as to say that I think you should too. If only for the pesto Trapanese recipe. Yum.

Recipe is here. I mean, really: why type when I can link?

(I added an extra teaspoon of lemon extract.)

Tuesday 20 August 2013

Lemon Ice-Cream


I haven't died. Honest. I don't even know where the time has gone, it's been almost a month.

Must try harder. (It used to say that on my school reports too, as well as 'talks too much', though I like to think I have turned that one into a professional advantage...)

Oh yeah, I forgot to mention (just as I forgot to update) that the good people at Taylor Wimpey announced their winners for the competition I judged. You can see the results here.

Now. I remember not so very long ago, or so it seems to me, spending a week making ice-cream every day and telling you all about it. There'll be a link to what I'm talking about on the left... Yeah, just click on the photo of a mini-sundae with a gingerbread heart and you'll get there.

(Wow, I really was going for it wasn't I? Haven't made a gingerbread anything in forever!)

I'm not saying that I haven't made any frozen delights since then, but I don't recall actually sharing any recipes, and sharing is important to me; I am a giver. I know it looks like I only take, but I assure you, at least 15% of the time, I am giving. Aggro mostly, but still. You need to try this recipe.


You will not need an ice-cream maker. But you will need some limoncello, or sufficient creative ability to think of a substitute for some. Can I be annoying and nip that creative streak in the bud? I suggest gin. Then you'd have lemon and juniper-scented gelato and can you honestly tell me that you wouldn't be happy with that?

Exactly.

Because I have one, I used my stand mixer to make this. But, no word of a lie, this could easily be done by hand as well. So I am allowing you the freedom of choice, which frankly, is more than you'd get from most bloggers out there. Don't say I never think about you lot, my 'end users'.

Also, I loved the extra kick of lemon you get from using the extract. I have nothing against my zester or fresh lemons in general, but as a good friend of mine once said, 'The fact is, sometimes lemon flavoured things aren't lemony enough.'

My sista ain't wrong.

Lemon Ice-Cream

You will need:

1 tin of condensed milk (397g)
300ml double cream
finely grated zest of one lemon
2 tbsp limoncello (or gin, see above)
1 tsp lemon extract (I used Nielsen Massey)

  1. Whisk everything together until thick and airily creamy. Freeze. That's it.

Friday 26 July 2013

Angel Food Cake

 
My niece loves this cake. She calls it 'marshmallow', but really it's cake. And dirt simple to make as well.

I have done some terrible things in my life. Really, truly awful things. I wore chinos to my friends' wedding, for example, although I don't *think* they noticed. I have served people food that had been dropped on the floor, and I was once very rude to a house keeper who ignored the 'Do Not Disturb Sign' on my hotel room. Perce really told me off for that one.

Admittedly, none of this is like cheating on my husband or anything (except for the chinos. I really don't know why I did that, and I don't know how to make it up or move on from it. All I can say in my defence is that they weren't from GAP.), but still. I feel bad. And I am going to add more to the list: I recently sent a very flippant email to a PR girl who sent me a press release about Nielsen-Massey Extracts basically telling her that I didn't care if Camilla Parker-Bowles used their products, I didn't blog press releases and I didn't think my readers would care.

Camilla and Vanilla

I also mentioned in passing, though, that my friend Stuart once wrote to Vanilla Parker-Bowles to tell her that he sometimes liked her hats (not always - nobody gets in right 100% of the time, not even royalty) and she actually hand wrote him a response. Well, she hand wrote the 'Dear Stuart' and 'Love, Camilla' bits, at any rate, though it's doubtful she has a 'thank you for your kind words about my hats' pro-forma saved on her iMac, so I am sure she wrote it all herself regardless.

Turns out my PR friend loved the story (must have missed my bad attitude) and offered to send me some samples. Result.

Now. I would never normally use vanilla extract in baking (even when I say to add it on the blog, I usually use the scraped out seeds of a real vanilla pod in my own kitchen, because I have a stash of plump, juicy ones I bought for almost nothing in Mauritius), and I have always considered the Nielsen-Massey brand to be expensive. How would it rate?

Well, I tried it out on this angel cake, since the key flavour note that I wanted was pure vanilla. And I have to say, I might be converted. It is so much easier just to add a few spoonsful of extract than mess about slitting and scraping out pods with sharp knives, and in my local supermarket, single vanilla beans cost upwards of £2. The Nielsen-Massey is only £5.99 for 100ml, so actually, all things considered, my cost-based aversion to extract doesn't stack up. I could make 10 of these cakes (which serve 16 people) with a single bottle. That's basically a quarter of the cost of beans.

The flavour is good; like my niece says, 'marshmallowy'. I would definitely use the extract again.

I have a few other recipes coming up that test out some other extracts that the company makes, so check back for those.

Boring disclosure: I am not paid for these opinions - I am just trying out the product. And trust me, I would tell you if I didn't like it.

Angel Food Cake

You will need:

16 egg whites (yes, really)
300g caster sugar
100g plain flour (for a really light cake, use half plain flour, half cornflour)
2 tsp cream of tartar
2 tsp vanilla extract

  1. Heat the oven to 180°C. Have ready a large (10 inch) tube pan (ungreased).
  2. Beat the egg whites with the cream of tartar and all but 3 tbsp of the sugar until you have a stiff meringue. I use my stand mixer, as ever.
  3. Add the vanilla extract and beat well.
  4. Mix the flour with the remaining sugar and sprinkle over the meringue mixture. Fold in with a spatula or balloon whisk. Pour the mixture into the tube pan, smooth the top, and bake for 35 minutes until puffed and golden.
  5. Invert the tube pan to cool (I upturn mine onto a wine bottle). When fully cooled, use a long bladed knife to loosen the cake from the sides of the pan and serve in generous slices with berries and whipped cream.

Tuesday 23 July 2013

Café Bombón


OK, so I don't know if all of you know how it works when you're a flight attendant, but basically, you rarely work with the same person twice. It's pretty amazing if you don't get on with someone (ha!), but deeply saddening when you do, since you never know if and when you'll have the chance to work together again.

I have some Spanish colleagues and years ago, after I had been in Barcelona, one of them mentioned a drink called café bombón that I had seen some people drinking and been curious about but afraid to ask for. ("Yo no hablo español.") I didn't see said colleague again until just recently and so forgot all about it.

Incidentally, I hate not daring to ask about food in foreign countries. Do you know how many stuffed courgette flowers I missed out on in my first few days of being in Rome? I don't even want to talk about it.

Anyway, whilst in The Canaries with the family recently, I made up for it. Turns out this drink is nothing more than a layer of condensed milk (you love it already, right?) topped with a gorgeous shot of darkly viscous espresso.

Percy adores it.

I think you should make one. I happen to have bought some pretty little glasses to serve it in, for authenticity, but you don't need to bother.

Back with a cake soon! I am off to dance off my morning caffeine dose to a few old MJ records.

Friday 19 July 2013

Do I really need a stand mixer?


I have been procrastinating for far too long now; time for me to just bite the bullet and get this post written.

I read a piece on stand mixers on one of my absolute favourite blogs a week or so back and felt compelled to offer the other side of the argument here. I do see that this puts me in the realm of those tacky popstars who record musical responses to well produced chart toppers, but so be it. I am old enough not to care now.

I have never met Sarah or been in her gorgeous newly fitted kitchen, but I have read her blog since the beginning and I feel like I know her well enough that she won't mind me stealing her idea for a post. See, she doesn't think she needs a stand mixer, and that you probably don't either. Well, I want to tell you that my stand mixer is one of the greatest things ever to come into my life and I think that you might well benefit from begging, borrowing or stealing one yourself.

Here's why.

Actually, no: let's start with a little about me that might not be clear from this blog.

  • I don't bake all the time. It probably ends up being one cake a week. Honestly.
  • I seem to have ended up making quite a few wedding cakes and do a bake sale every year.
  • I own a hand mixer as well, but no food processor (I hated it and gave it away).
  • I am not scared by 'difficult sounding' recipes.
OK. I should also probably say that my stand mixer was a wedding gift from my whole family. It's a Kitchen Aid Artisan in beautiful Candy Apple Red (for the record), and every time I use it it reminds me how generous my family are and how much I love them.

(If you hate your family and have to buy your own mixer, well, I still think you'd love using it, so don't think that's my only reason for disagreeing with Sarah.)

Reasons to own a stand mixer:

  • The power: no electric hand mixer can compete.
  • The fact that it mixes thoroughly: cakes I do in the Kitchen Aid have better texture and crumb and rise more evenly than those I do by hand or with a hand mixer.
  • Hands free: I'm a hands free junkie. I can beat eggs and pour hot sugar syrups into them at the same time without burning myself, and answer the phone while baking if I have to.
  • Capacity: 16 egg whites beaten to a meringue in one bowl? No problem. Deep sides mean mess is minimal.
  • Style: Candy Apple Red. How many times do I have to say that?
  • Multi Use: maybe that's pushing it, but you can do great mashed potatoes in a mixer like mine. Also great for making and serving eggnog at Christmas. Seriously.
Sarah recommends instead an electric hand mixer. I own two, but never use them.

Reasons I don't rate hand mixers:

  • The lack of power: they are just rubbish. Even on high speed. Making French buttercream with one in my pre-KA days nearly killed me (and the mixer!).
  • They break down: maybe I was overusing mine, as I did supply a café with cakes for a while, but I never seem to get them to last more than a year of regular use.
  • Takes up cupboard space: I may be in the minority, but I find this far more annoying than having to have my stand mixer sitting on the work top in the corner looking pretty. And my kitchen is small.
  • I have to stand at the mixing bowl for however long it takes. And genoise takes 15 minutes with a hand mixer. No thank you!
  • The beaters scratch my glass bowls. Unsightly!
  • They can overheat: my stand mixer can go all morning on high and not even break a sweat.
I do see that cost is a reason that people don't indulge their stand mixer desires, and certainly I would not have spent the money it cost to buy the Kitchen Aid on myself, which is why they are so often on wedding lists, let's face it. However, I would not have baked half of the more labour intensive cakes I have done were it not for the stand mixer and for that reason alone I recommend them. If you like baking, you'll find ways to use it. If you think you want one, you'll probably use it all the time.

Just my two cents'.

Now go check out Sarah's great blog!

Friday 5 July 2013

Chocolate Chocolate Chip Cookies


Eek. Time passed.

I can only tell you this: turning thirty-one and managing not to kill myself (at what age does one need to get out the anti-ageing creams?) was quite enough of an effort over the last few weeks. I haven't had any baking inspiration since I have been far too wrapped up in feeling OLD. It is so... difficult to get over.

Pink vermouth, a great steak and the fact that I spent the evening of my birthday with my husband, who is more delicious than anything I could have baked for you today or any day anyway, are what got me through.

I no doubt will need more of the same next year.


Anyway, I made these cookies ages ago and I know there was some special reason for doing so and also that I was really pleased with them, but I can't remember what for or why. Not a great way in to this, but also perhaps just what we need to coerce ourselves into planning a little journey into baking self discovery. Quite timely too, since we haven't had a cookie around here for a while.

(I did slate chocolate in my last post though, so consider this further evidence of the fact that I blow hot and cold like nobody's business.)

I am planning on doing some baking at the weekend (in between BBQs and beach trips, should the weather hold), as well as some light ice-cream production. So there should be a fair few posts this month.

In the mean time...

Chocolate Chocolate Chip Cookies

You will need:

100g plain chocolate
150g plain flour 
25g cocoa powder
1 tsp bicarbonate of soda 
1/2 tsp salt 
125g softened butter 
125g sugar

1 tsp vanilla extract 
1 egg
350g chocolate (I used plain and milk, in equal measure, chopped into small chunks) 

  1. Pre-heat the oven to 180°C and line a baking sheet with baking parchment.
  2. Melt the 100g plain chocolate and set aside to cool a little. Then beat it with the butter, sugar, vanilla  and egg until all is nicely amalgamated (yes, this is the lazy person's cookie).
  3. Add the dry ingredients and mix well, then fold in the chopped chocolate. 
  4. Use an ice cream scoop (or a couple of spoons) to measure out dollops of dough and space them well apart on the baking sheet. Bake for 14 minutes although aim to underbake slightly as everybody loves a chewy cookie.
  5. Cool on the sheet for five minutes then transfer to a wire rack to cool completely.

Friday 21 June 2013

Lady Grey Tea and Alphonso Mango Tiramisu


I just want to state, unequivocally, that I, Peter Hallsworth, am a Hawaiian Tropic Boy. I am so in love with their SPF 50 Silk Hydration 12h Moisturisation lotion that I want to carry on wearing it everyday, despite no longer being on holiday.

I just don't get on with other brands. Other brands don't have hydrating ribbons. And don't get me started on the fragrance. All I will say, if pressed, is that they need to bring back the Factor 50 'Pink Bits' from a few years ago but seem to have discontinued. Then, I will be truly tanning happy.

A word on tanning by the way, for all the Summer Bunnies that abound right now: use a high factor. And, when you're doing your lover/brother/friend/etc.'s back, remember to do their sides too. You aren't buttering a piece of toast, OK?

(I had a great holiday. I wish I were still on it.)

Right back to usual service. So, this is it. The recipe I am most proud of in all the world. Proud because it is my baby; my creation.

I always said I'd never write about it on here, because of some annoying copyright issues (which I have overcome by changing things slightly), but you know what? It's Summer. It's Alphonso Mango season. And I want to.

This dessert was my entry for the TV show 'Britain's Best Dish'. I say to you now, up front, I didn't win. I made it through the first round and then got booted off by judges who thought that curdled crème brulée and rock like scones were a safer bet. Whatever.

I don't know if they eliminated me because they thought my opponent's dessert was better (as if!) or because I told the wardrobe woman, who, because of 'camera issues', wanted me to wear a different shirt to the one I had selected (a banging Tsumori Chisato number in royal blue with miniature red-roofed house print detail - delicious), that the shirt was going to be the most amazing thing that day time ITV had ever seen and covering up half of it with the stupid apron I had to wear was quite enough compromise for me for one day, tha-ank you very much.

When someone comes into a room wearing Tsumori Chisato, you tell them they look fucking amazing. You don't tell them to take it off.


Annoyingly, I forgot to take photos after this. Just imagine intricate layers. Lovely. Like the Hyrdrating Ribbons in Hawaiian Tropic.

This dessert was born out of my hatred of chocolate. This may come as a surprise, except to regular readers, but I just don't think chocolate is the way to end a meal. I want fruit, I want sweet and creamy-smooth texture and I want delicacy. I want this tiramisu.

It is not a quick undertaking; you'll need about an hour because you have to make the ladyfingers yourself. But it is easy and can be made up to two days in advance.

If you make only one of my recipes, then make this one, please. I promise you'll enjoy. The mangoes and Lady Grey mingle and make the prefect last mouthful of any special meal.

A quick note: Alphonso mangoes are easy to find in Indian groceries. If they are out of season, you can get tinned purée, which is fine, or use whatever mangoes, kesar or otherwise, that they do have.

Lady Grey Tea and Alphonso Mango Tiramisu

For the Lady Grey Fingers:

2 eggs, separated
50g sugar
100g plain flour
1 Lady Grey teabag (or 1 tsp tea leaves)

  1. Beat the egg whites to stiff peaks; set aside. 
  2. Beat the eggs and sugar, and the contents of the teabag or tea leaves, for a few minutes until thickened slightly. Fold in the whites.
  3. Sift over the flour in three parts. Fold in gently. Pour the mixture into a piping bag, and pipe fingers onto the parchment lined sheets. You should get two dozen 10cm fingers easily.
  4. It is traditional to sprinkle ladyfingers with sugar before baking; I don't bother. Bake for 10 minutes at 170°C.
  5. Cool on a rack.

For the tea infusion:

2 Lady Grey teabags
200ml boiling water
zest of an orange
zest of a lemon
3 tbsp Cointreau (optional)

  1. Simply make the tea and add the other ingredients. Leave the bags in. Steep for 15 minutes or up to an hour. It will be strong, and needs to be.

For the mango purée:

2 Alphonso mangoes
sugar to taste

  1. Peel and chop the mangoes. If you don't fancy puréeing them, just chop finely, but I like the way the smooth purée melds with the creamy mascarpone later. Sweeten to taste.

For the mascarpone cream:

250g mascarpone
3 eggs, separated
75g sugar

  1. Beat the egg whites to stiff peaks; set aside.
  2. Beat the eggs and sugar together until thick. Fold in the mascarpone, a little at a time. Lastly fold in the whites, very gently.

Whew, this is a long recipe. OK, we should have four components ready and waiting. Let's make the tiramisu!

I usually do just one big one. But for company best, these amounts should do 6 portions if you use fancy glasses.

So. Start with a little purée. Then dip ladyfingers into the tea infusion, allowing them to become nice and moist, then make a layer of those. Follow with mascarpone cream. Repeat these layers until all ingredients are used and be sure to finish with a mascarpone layer.

Done!

Chill for at least four hours. I like this to come out of the fridge a good half an hour or so before serving. Enjoy! 

Monday 10 June 2013

Bavarois à l'Orange et au Mangue


One too many daiquiris last night. Please forgive me if my agreements aren't quite as they should be!

Alphonso mangoes are in season. So while I am on holiday, which I currently am (I'm writing this when I should be packing my case), why not let the fact that I made this wonderfully creamy delight recently convince you to buy some? Hmm? Why not indeed?

I followed, as many people seem to, the instructions of Julia Child in Mastering the Art of French Cooking, Vol.1. But instead of making bavarois aux fruits with raspberries, I used 1 cup of mango purée in their place.

I should warn you that unmoulding these things is basically impossible the way she tells you. Hence ramekins.

I know this because my beautiful large version, set lovingly in a kugelhopf tin, collapsed when I attempted to invert it. I think it was my fault and the water I dipped the chilled tin into was too hot. But essentially, if you make this, I say take no risks. What should have been a beauteous creation, surrounded with berry fruits and dainty little mint leaves, ended up as slop. Sad face.

You could do it in tea cups and it would be perfect!

See you when I get back!

Tuesday 28 May 2013

Vanilla Boy Cupcakes


I am determined to get a post up here today if it kills me. It's not going to be Bircher Muesli (sorry, Clare), because that's for warm weather and we are once AGAIN in the deep mid winter here in the South East (or South West, it depends on how you peel the potatoes really). It has finished off my Busy Lizzies, and I am so annoyed about it I could spit.

Anyway, you're not getting anything Alphonso mango related either (for 'tis the season!), because I'm saving that until I have more time. So I'm revisiting the humble cupcake. With a good reason.

I was recently reading all about Green Goddess Dressing, dreaming of my dear San Francisco, and became suddenly and uncharacteristically jealous. I had realised, you see, that nobody is ever going to create and name a dish for me. And I'd really like them to.

No time to cry about it, dears. I'm only around for two days before flying off again. Instead, let's create a dish for me ourselves. I give you the Vanilla Boy Cupcake. For yes, I have been being referred to as 'Vanilla Boy' for quite some time now, and despite disliking it intensely at first (I don't like the connotations of its modern usage and anyway consider myself to be more of a Cinnamon Swirl kind of a brother), have learned to accept it.

So my recent and quick foray into the all in one method of cake making has been names, immodestly, by yours truly and for yours truly. Enjoy.

I have to stop here. Dinner is not going to cook itself.

Vanilla Boy Cupcakes

You will need:

2 eggs
125g self raising flour
125g sugar
125g soft butter
1 tsp vanilla extract
1 tsp baking powder

100g soft butter
175g cream cheese
250g icing sugar
seeds from one vanilla pod

  1. Heat oven to 180°C and place liners in a 12 cup muffin tin.
  2. Put the first six ingredients into a bowl and beat until combined and smooth. Divide among the liners and bake for 20 minutes. Cool on a wire rack.
  3. Beat the next lot of ingredients together and use to ice the cakes. 
Can you tell I'm in a rush? See you soon for the mangoes!

Thursday 16 May 2013

Coconut Fantasy Cake


You'll forgive my somewhat ridiculous naming of this cake, I know. You just have to understand that I was quite literally blown away by how beautifully soft, light and yet rich it was. A true coconut fantasy, and quite possibly the best use for Malibu there is. Aside from this.

I always used to think that I hated coconut. But now I am a man obsessed. This is known by my friends, who use it to lure me into trying new things. Recently, for example, Clare told me about her new morning lover, 'the Summer porridge', Bircher muesli. I feigned a polite, yet vague, interest, knowing that porridge is good in any season, and carried on with my life.

But then I received the following text, late one night:

Just about to prepare my Bircher muesli for the morning. It will contain dessicated coconut.
Let's be clear about this. I paid attention. Leaving for work the next day, I didn't have a chance to follow her lead but I literally cannot wait to get home and try this Bircher stuff out. I'm going to experiment with coconut and raspberry first, but also want to try getting some pineapple or dried mango in there. Delicious.

Now, I'm going to bring it back to this cake.

It is a genoise. I won't be apologising for that but I will be saying that I feel like nobody makes these cakes except for me. Which I do understand when professionals tell you that they whip egg whites, crush garlic to a paste and do all those other laborious kitchen tasks by hand. Do me a favour and ignore them. Make this. Then tell me.

The thing with lots of coconut flavoured cakes is that they contain coconut in the batter. That's lovely, sometimes, but it does lead to rather a heavy cake. If you want the kind of crumb that holds together in feathery, cloud-like perfection, then you need a genoise. Pure and simple.


Want to do that by hand? Thought not.

The recipe for the cake is here. I made up a half batch and baked it in a 6' deep sided cake tin, slicing it when cool into two layers and soaking each one with 2 tbsps Malibu. It's not a strong liqueur and as very sweet, so there's no need to thin it down with sugar syrup.

The icing is special. Follow me.

Coconut Buttercream

You will need:

3 egg yolks
75g caster sugar
85g golden syrup
250g butter, cool, but squishable
3 tbsp Malibu
2 tsp vanilla extract


  1. In a large heatproof bowl, put the egg yolks and beat them on high speed with an electric beater for about a minute, or until slightly thickened.
  2. Put the sugar and syrup into a small saucepan and stir until all the sugar is moistened. Then place on a medium heat, stirring constantly until the edges of the mixture start to bubble. Stop stirring and remove the spoon or spatula you were using from the mixture.
  3. Allow the syrup mixture to reach a full rolling boil. This means that you should see large bubbles over the entire surface, including the centre. It shouldn't take long.
  4. Begin rebeating the yolks again, on medium speed, and immediately pour in half of the syrup. Avoid pouring it directly on the beaters, as it will splash against the side of the bowl. Beat for around 30 seconds then add the remaining syrup in the same way. This time beat the egg yolk mixture until the outside of the bowl is cool to the touch. That will take maybe 10 minutes or so.
  5. Add the butter gradually, on medium speed. Once all the butter has been incorporated, add the Malibu and vanilla and beat until smooth.
Use to frost the cake and decorate with grated coconut, which I buy frozen from my Indian supermarket. You could use dessicated if you prefer, or grate a fresh coconut.

Wednesday 8 May 2013

Competition!

Guys! I'm such a slacker...

I completely and utterly forgot to let you all know that I have been asked to judge a dinner party competition that you can all enter to win cash. It must have been all the lovely Champagne I drank over the weekend for my sister's birthday... (She drank some too, it wasn't just me. Promise.)

The competition is being held by Taylor Wimpey, who admittedly, don't spring to mind when you think of dinner for friends. But reading through the competition details, I can totally see the idea -

'When you move into a new house, naturally you want to show it off to friends and neighbours as soon as possible (once the unpacking's out of the way, anyway). There's no better way to do this than to get everyone round for a dinner party, allowing you to flex your cookery skills and put that new kitchen through its paces - and officially declare your home a place where guests are welcome.

We're asking bloggers to submit a dream dinner party menu, including a starter, main, dessert and an accompanying wine - you can also include a welcome drink of your own invention.'

 That is EXACTLY what I wanted to do after we moved into our current home. And we wasted no time in getting people round for full on, three course food marathons. So I can't wait to see what entries we receive.

You know who else is judging? Well, other than someone from TW (only fair that they get a say after all), my fellow judge is none other than Ruth Clemens, of The Pink Whisk.

Amazing. I love her blog. (She probably doesn't even know who I am.)

Full terms and conditions are here. I would say definitely try this one out. There are going to be 3 winners of £100 and 1 grand prize winner will bag £250. Definitely worth a flutter if you ask me!

I'll be back soon with more sugary goodness. Keep it sweet until then!

Friday 19 April 2013

Crumble Bar Cookies


Again, we thank Instagram (@peterdelicious) for his kindness.

Yesterday, I got bored and made a coconut genoise cake that was as light and fluffy as a little cirrus cloud, wispy, delicate, perfect. But we have made a silent promise to ourselves around these parts to stop jumping about all over the place and try to post in some sort of order. So you can wait for the Malibu soaked wonder and have bar cookies instead.

When I made the panna cotta I was scared it wouldn't be sweet enough, or to be honest that it wouldn't even set, and since I had planned it to be dessert at Brideshead Club, I knew I needed a fall back option. So I made these.

They're the kind of thing your mum would make with you when you were little. Not fancy, quite unassuming. But oh! So delicious. And the perfect use for that nectarine butter that I know you're all wondering what I've been doing with. (It's been porridge topping, as a general rule.)

You could use jam instead. Or, maybe, a little jam and a layer of fresh raspberries. Do you see what just happened there? I set you an assignment. Hop to it. Report back on Monday with both variations and I shall grade them accordingly.

Crumble Bar Cookies

You will need:

135g flour
100g sugar
70g rolled oats
115g butter
1/2 tsp baking powder
pinch salt
jam or fruit butter

  1. Grease a 20cm square tin. Line it. Grease the lining. You'll want to give up at this point, I know, but persevere. Set the oven to 180°C.
  2. Mix the flour, oats and baking powder together. Rub in the butter until you have a crumble mixture. Add the sugar.
  3. Press 2/3 of this sandy mixture into the tin, forming a base. Bake for 20 minutes.
  4. Remove from oven; top with jam or fruit butter (as much or as little as you like) and the remaining crumble. Bake for another 15 minutes.
  5. Cool in the tin. Slice. Eat.
  6. Makes 8 large bars. I like large. You could do 12 or 16 if you prefer.

Thursday 11 April 2013

Panna Cotta


OK, so here's a common theme in my life: repetitive conversation.

I work in the airline industry. One of the best things about my job is that I work with different crew everyday. I mean, think how great it would be for you, office worker, if you could trade that old sour puss in the cubicle over there for a different colleague every day? It is amazing.

But also, frustrating. You can sometimes find yourself talking about the same stuff everyday. Where you're from, where you  live now, what languages you speak... And then you start talking about your personal life. Cats, boyfriends and exes.

But I don't have any of those. So people ask me about my husband. They request to see pictures. I usually say I don't have any (too lazy to find one!), but sometimes I relent, and my soul crumbles a little when I see on their faces that they think I'm the lucky one.

---

They ask how long we've been together and when I tell them (12 years and counting), gasp and ask me what the secret is. Bored with trying to answer that seriously (I rule my house with a grip of iron and he's too scared to leave), my answer is always the same:

"Well, I make a pretty good panna cotta..."

But it dawned on me the other day that I actually had never made a panna cotta, didn't even know how. So I know you'll be pleased to know that my sarcasm has become truth. I do in fact make a pretty good panna cotta.

It took some research. Google will show you that people are quite opinionated about panna cotta and what should or shouldn't go into it, how much gelatine the mixture needs and whether or not the creamy pudding should be served unmoulded or not.

It began to give me a headache, which persisted until I had the wisdom and foresight to think to myself, screw it, I am master of my own destiny. So. This is panna cotta my way. Follow if you wish.

(I stole the buttermilk idea. It was delish.)

Perfect Panna Cotta

You will need:

300ml single cream (or 600ml and don't bother with the next two ingredients)
250ml buttermilk
50ml milk
3 tbsp sugar
1 vanilla pod
2/3 sachet powdered gelatine (I used Dr. Oetker brand and it weighed around 8g)

  1. Scrape the seeds of the vanilla pod into the cream. Heat the cream until just below boiling and then allow to cool slightly.
  2. Meanwhile, put the milk into a large bowl and sprinkle over the gelatine. Leave for 5 minutes.
  3. Whisk the warm milk into the milk and gelatine; add the buttermilk and mix well. Strain into a jug.
  4. Pour into 4 125ml ramekins. Chill until set (around 3 hours). Serve at room temperature. Which I did with rhubarb cooked in a little sugar, orange juice and left to steep with the left over vanilla pod.

Tuesday 2 April 2013

Brains S.A. Gold Chutney


We all run away from the sadness in our lives. Good things come to an end. We're not always ready to face the truth and it can be a bitter shock, discovering that the joys we've held so close to our hearts are no more.

Readers: I have finished the last of the Brains S.A. Gold chutney.

....

Please don't worry. All you need to know is that in time I will heal.

The good news is that, even though I have never mentioned the chutney to you before (despite having made it three times), you can get the recipe in this book.

I can tell you two things. #1 is that I am not going to give any away next time. #2 is that you don't need to use Brains S.A. Gold ale, but that's my local and it's delicious.

Pam says make the chutney in October time, but frankly, you can make it whenever. It's not like swede is seasonal.

Thursday 21 March 2013

Perfect Meringues

@peterdelicious on Instagram

It has just occurred to me that I was meant to maintain a steady stream of posting throughout this long trip I've been on this week and I haven't. Long story short, at some point someone must have coughed on me and now I'm sick. So we're lucky I'm doing this, since I haven't accomplished even half of the things on my 'to do while away' list. If I ever catch the person responsible, I am going to make them pay.

Having fulfilled my recent French fantasy (well, one of them... I don't think I've told you of the one involving chilled Mumm, the penthouse suite of the Hotel de Vendome and an unthinkably large portion of fromage blanc au miel de fleurs. I think that's for another time.), I found myself with egg whites on hand.

A familiar drudgery.

I am sick of freezing them because I never seem to come back to the hard little bags of albumen once they have been squirrelled away in the ice box. So I decided to try turning out some of those huge, billowing meringues that you see under cover of glass in all the Parisian bakeries. They are usually expensive, which irks me, because they're made from just egg whites and sugar, and also make me think of Eton Mess which the French probably don't even know about. Shame.

These are what 1950s American teens would call a 'snap'. And they have gooey middles. I feel it important to point that out. 

Meringues

You will need:

5 egg whites (125g)
250g caster sugar

  1. Pre-heat the oven to 180°C. Line a baking sheet with parchment.
  2. We're going to go the Swiss meringue route here: dump the sugar and whites into a heatproof bowl and whisk over simmering water until you can no longer feel grains of sugar when you rub a little of the mixture between your fingers. I know this sounds strange, but it works: the sugar will dissolve.
  3. Remove from the heat and beat with an electric mixer (for ease) until cool, around 10 minutes.
  4. Dollop the mixture onto the prepared sheets, put them into the oven and immediately switch it off. Allow the oven to cool fully before removing the meringues. I left them in there over night and they were fine.

Friday 15 March 2013

Madeleines


Just recently, while smoking shisha in St. Germain, I reached a decision.

(Before we go any futher, let us just take a moment to be seduced by the alluringly alliterative nature of that statement. Truly, it puts me in the mood to go and order rillettes de veau in Rio De Janeiro, nibble daintily on a bowl of pilaf in Poznan and sip velveteen Merlot in Marlow.)

I wanted to make something French. Not croissants, because I value my sanity. But something exotically unfamiliar and crowd pleasing to hand round with tea after the coq au vin I was planning.

My ability to make any firm plans being weakened by the heavy scent of apple scented molasses tobacco, the idea lay dormant until I reached my kitchen at home some days later, tired, grouchy and wearing an airline uniform that had taken on the aroma of the passenger cabin of a Boeing 777-300ER.

Ultimately, it came down to the fact that I hadn't used my madeleine tray in years. And let's be realistic, it was never going to be croissants, not least because you don't eat them after coq au vin.

(As if that were the only reason.)


I am 80% pleased with how they turned out. Moist, and good flavour, but I want the hump that you get on a commercially produced madeleine. The hump, but none of the oily synthetic taste. I'm thinking I might try adding baking powder, but a friend tells me I just need to bake the batter in those little scalloped boat tins rather than a flat tray. Will I justify the expense? We shall see.

Madeleines

You will need:

30g melted butter
1 tsp vanilla
75g egg yolks (5 medium)
60g caster sugar
45g plain flour
1 tbsp water

  1. Pre-heat the oven to 180°C. The madeleines will be in there for  a scant 5 minutes, so make sure it's at temperature as you don't want to leave the batter hanging around.
  2. Put the vanilla, sugar and yolks into a heatproof bowl suspended over simmering water. Whisk gently until the yolks are warm to the touch. Remove from the heat and beat on high speed with an electric mixer until thick and creamy. This will take 9 or 10 minutes. You will be bored.
  3. Add the water. Whisk in.
  4. Sift over the flour and fold in gently. Next fold in the butter.
  5. Grease your madeleine tin and fill each indentation half way with batter; bake for 5 minutes. Cool on a rack.
  6. Serve dusted with icing sugar. Makes 24 2" madeleines.
Related Posts with Thumbnails