Home About The Fame! Contact

Tuesday 29 December 2009

Pumpkin Whoopie Pies

I the fabric in the background.

Or, 'The Return of the Martha Metricator'.

I don't know about you, but I think both titles have their charms.

This is another recipe that I have been meaning to write about for ages. Truth be told, the reason I haven't done so is that I don't like the photo I took of them, but after the Mushroom Cookies, it seemed like a natural thing to do. Sharing the American recipe love with the rest of the world, I mean.

Whoopie Pies aren't popular at all in the UK. They should be though; they're basically cake sandwiches at the end of the day. And if a cake sandwich cannot be popular in the country that brought you the sandwich in the first place (thank you, John Montagu!), there is something terribly wrong.

I saw Martha make these on television when I was in New York once (I was towelling my hair not really paying attention, and at that point didn't even know who Martha was, but there's only so many times you can hear somebody repeating the word 'whoopie' in an odd voice before you sit up and take notice), and immediately decided to make them for Halloween the following year. Which was this year and also my friend Bridie's birthday - she had the cake stand. More than enough cause for a baking session, I'm sure you'll agree. I don't suggest you wait for such a reason though. Just get in the kitchen and get going right now!

Incidentally, Lynda, who I know reads this (Hi Lynda!), told me when we were staying at her place in Melbourne, that in her neck of the American woods (so to speak... She's not an Aussie), they call these cakes 'Moon Pies'. I think that's a much better name! So that's what I am going to call them from now on.

I halved the recipe by the way. You don't need to feed an army.

Pumpkin Moon Pies

You will need:

200g plain flour
1/2 tsp salt
1/2 tsp baking powder
1/2 tsp bicarbonate of soda
1 tbsp cinnamon
1 tsp cloves
1 tsp ginger
200g dark muscovado sugar
125ml vegetable oil
400g pumpkin purée (one can - you could just steam and mash a butternut squash, and then weigh 400g of it)
1 egg
1 tsp vanilla extract

200g cream cheese
100g icing sugar
2 tsp vanilla extract
  1. Sift the dry ingredients together. Pre-heat the oven to 180°C. Line a baking sheet.
  2. In a large bowl, mix the oil and sugar, using a wooden spoon.
  3. Then add the eggs, vanilla and pumpkin, and stir until smooth.
  4. Fold in the flour mixture.
  5. Using an ice-cream scoop, place dollops of mixture onto the prepared baking sheet, well spaced apart.
  6. Bake for about 12 minutes or so, until a tooth pick inserted into the centre of the cakes comes out clean.
  7. Cool on a wire rack.
  8. When cool, sandwich the cakes together, flat sides facing, with cream cheese frosting, which you make by mixing all of the ingredients together in a bowl until smooth.
  9. Eat! They make great sharing food. But I won't judge you for having a whole one to yourself.

Tuesday 22 December 2009

Christmas Cake Unveiling

Ta da!
I told you it would be kitsch.


I know it isn't actually Christmas for another few days, but this is the only chance I shall have before the big day itself to post a picture of this year's cake, as promised. I have been away since Friday, and would normally decorate a cake like this on Christmas Eve, but as I'll only get back from Paris late on the 24 this year, I had to do it before I left. Since I had all of about four minutes to do so before I had to catch the train to Manchester, I will be expecting your kind forgiveness for the bad photography.

Recipe is here.

Have a delicious (x 3) Christmas everybody!

Friday 18 December 2009

Pumpkin Mini-Pies

This is not a Pumpkin Mini-Pie. You must scroll down for those!

I recently inherited a pie dish.

Well, actually, I suppose strictly speaking that isn't true: I rescued it from the box of stuff that Mr. Other P's mum was sorting to give away to the charity shop last time we were at her house; nobody had to die for me to get my hands on it. I don't want to be accused of sensationalising the facts here, you do see.

You'll probably never find anybody who loves pie more than me (though I think that conveys quite the wrong impression about what I look like...), and although I have made pies before, I have never done so in a proper dish. So getting one, was, for me at least, quite exciting.

But it did bring with it a big question. What would the first pie I made in it be?

Let me tell you: I was determined it would not be a sweet pie. I know you won't believe me, but it's the truth. Every fibre of my being wanted it to be savoury. I even had it nailed down to two choices (which, for those who are interested, were a sausagemeat pie with a herbed crust, or a puff-pastry pie made using the leftovers from a roast chicken, bound in a creamy and well seasoned béchamel as the filling). But needs must, dear reader, and my pie-related daydreaming proved to be time wasted.

The fact was, we needed another dessert to cater for Christmas pudding haters at our Un-Christmas Christmas earlier this month. (That's the one you have with friends at a time that's convenient for everyone to attend, for anybody who isn't familiar with the term).

My love for all things pumpkin has been well documented elsewhere, so I know you won't need further explanation of how and why we arrived at the decision to make pumpkin pie and ice cream that second dessert. However, I had never made a pumpkin pie and in fact, don't even remember having eaten one in my life before now either, except for a one-off occasion when we were little, and it was hideous. (Sorry Mum, but it really was.)

Anyway, time not being on my side (though when is it ever?), I decided to just follow the recipe for 'Libby's Famous Pumpkin Pie' printed on the tin of pumpkin I had. I was dubious about it, I must say - I always think that nobody ever follows these kinds of recipes, and that they are just made up by a team of people who need to find something to fill space on packaging. So I was unsurprised to find that the recipe made more than enough filling for my pie, despite using the right size dish and everything. Fail? Well, not quite.

You would have to be a very negative person - yes, more so even than me - to be unhappy about having too much pumpkin pie filling on your hands. I think it may be one of the most delicious liquids known to man. And as it happened, I had extra pastry on my hands too (making mince pies you see - when you buy a house with an oven as big as the one that the previous owner left in our kitchen, you never switch it on to cook just one thing at a time) .

And happy day! This chance occurrence led to these...

We passed them around on a platter with welcome Champagne.
The glamour!


...Pumpkin Mini-Pies! Are they not quite possibly the best thing you've seen in 2009? (And just in the nick of time too!)

You should also know that we still had filling left even after making 18 mini-pies, as well as the full sizer. We just baked it alongside, in a little Pyrex dish, and had crustless pie with ice-cream as a cook's treat afterwards. Well, you always need one of those.

Pumpkin Pie (Libby's)

You will need:

250g shortcrust pastry (I made mine - you can use shop-bought if you don't mind wasting money on something that is simple, quick and easy to make)
2 eggs
425g can Libby's pumpkin
175g granulated sugar
1/2 tsp salt
1 tsp ground cinnamon
1/2 tsp ground ginger
1/4 tsp ground cloves
250ml evaporated milk (or single cream)

  1. Line a 23cm pie plate with the shortcrust pastry and bake blind for 15 minutes in a 220°C oven. I don't really think you need do this, but it says to on the tin. I didn't bake blind for the mini-pies, and they were fine.
  2. Mix everything else together, and pour into the baked pastry case. Don't over fill! Bake at 180°C for 40 minutes or so, until it has set. It will still be a little moist though. Rejoice in the squishyness.
  3. Use the leftover pastry (you'll have some!) and filling (ditto) to make mini-pies, using a mini-muffin tray. They take about 25 minutes to cook.
  4. Cool slightly, and serve with ice-cream.
Optional extra: sprinkle large pie with pumpkin seeds, and place one seed on each mini-pie. I think you'll agree this makes them look very sweet indeed, and as such, is not really 'optional' at all.

Monday 14 December 2009

Mushroom Cookies


I remember consoling myself when I found out that Father Christmas wasn't real, that at least there was still the Tooth Fairy. Then when Mum told me, in the same breath, that, actually, she wasn't real either (the Tooth Fairy. Of course my mum is real!), I was really fraught. All this took place in the bathroom by the way. Strange, the details you remember. She had yellow rubber gloves on and was cleaning. Again, my mum, not the Tooth Fairy.

The biggest shock of them all though, which has haunted me for a great many years (and get ready if you don't know, 'cause this is big), was discovering that BETTY CROCKER IS NOT REAL.

I know. I'm sorry. The shock. The horror. But it's the truth. You need to face it. On the bright side, there's a bad joke in there somewhere: 'What do Santa, the Tooth Fairy and Betty Crocker have in common?' Ha.

I just didn't get it. How could nobody write the greatest cook book in the world?


That's this book, unless you didn't know
where I was going with that... And that's a first edition!

I don't want to dwell too much on the negatives; we must pull ourselves together. The fact is, you still get Christmas presents without Father Christmas, the money for teeth has kept coming to all the children in my family with or without fairies, and you can still bake Betty's cookies, even if someone else wrote the recipes for them because Betty herself was just made up by cold and calculating company executives.

Now, quite aside from reminding ourselves that there is no Santa, all of this is very seasonal. Honest! My Mum had Betty Crocker's Cooky Book when she was younger, and now I have it (one word: Theft). And there's a recipe that I have wanted to make from it for years and years and years. And years. It is for Chocolate Crinkles and it is on page 23, right next to the recipe for Snickerdoodles, which we made lots when we were children.


Now you may ask why I haven't made these cookies before. Well, there are two reasons. And here they are:

  1. The recipe makes 6 dozen cookies! That's about 3 million more than I need.
  2. The recipe contains vegetable oil. That's fine for carrot cake, but the idea of using it cookies makes me feel a bit sick. Tell me you don't feel the same.

But then recently, when I was looking through the Cooky Book, it occured to me that if you are the type who makes cookies to give away at Christmas (and I am), having 6 dozen of them made in one sitting is pretty good going. You can see where this thought led.

But there was still the problem of the icky-sicky vegetable oil. What to do? Well, I'm glad you asked. Here's what I did: I allowed myself to be inspired by Betty 'I'm not really real' Crocker, but decided to see what Martha 'I'm real and can be held accountable if the cookies are horrid, just like when I was held accountable for lying about a stock sale and had to go jail' Stewart had to say on the subject. Turns out that Martha makes the same cookies, only she adds more chocolate (hurrah), doesn't use oil (swell) and calls them 'Chocolate Crackles' instead (not sure about that one).

This is irrelevant though, because I have named them Mushroom Cookies. This is because when we were making them, Mr. Other P, who sometimes joins me for a bit of kitchen ker-plutzsky, especially when I offer to make him a Snowball if he does, said that they looked like mushroom tops. He was right; they do, and I am now dying to make them in different colours, so that they look like toadstools. Don't even try to tell me that you too don't want to see that. I will consider it my sacred duty to do so, and report back.


He has a point, no? Mushrooms.

Because it's the Season of Good Will and all that, I have taken it upon myself to metricate Martha's recipe (and alter it, slightly, to use the sugar that I had in the house). Consider it my gift to all non American cup-measuring mankind; just call me 'The Martha Metricator'. (I love Martha. She's fierce!)

I didn't get 6 dozen cookies by the way, but that's because I made them big. I think we got about 50. Cookies, not dozen. And they were chewy and rich and tasted GORGEOUS!

Mushroom Cookies

You will need:

225g plain chocolate
225g plain flour, sifted
30g cocoa, sifted with the flour
2 tsp baking powder
1/4 tsp salt
115g butter, at room temperature
225g sugar (180g muscovado sugar, 45g granulated white sugar)
2 eggs
80ml milk
granulated sugar
icing sugar

  1. Melt the chocolate in a bowl over a basin of hot water. Allow to cool. Make yourself a Snowball. It's Christmas, and you'll want something to drink while making these.
  2. Cream the butter and sugars until smooth and light. Then add chocolate and the eggs, and mix thoroughly.
  3. Add sifted flour and cocoa, as well as the baking powder and salt. Add the milk. Mix well. Chill the dough for an hour or so. We left it over night. Don't worry. You can have another Snowball tomorrow.
  4. Set the oven to 180°C. Line a baking sheet with parchment. Put some granulated sugar in a bowl, and some icing sugar in another.
  5. Roll pieces of the dough into balls the size of a walnut, and then roll them first in granulated sugar and then icing sugar. Place well-spaced apart on baking sheet, and bake for 14 minutes.
  6. Cool on a wire rack. Pack and give away, if you can bear to.

Saturday 12 December 2009

Food Memories: Azuki Bean Stew


Some of you reading will know this already, but for those that don't, I have been lucky enough to live abroad several times in my life (I'm not counting Wales, where I live now, although you do cross water when making the journey back to my home town of Manchester, in England, so maybe I'm technically still an ex-pat...). I say lucky and mean lucky, because although there are times when living in a foreign country can make you scream and shout to please be allowed to return to the normaility of wherever it is that you call home, on the whole I think it can be an extremely positive and even life changing experience. And what's more, you get to eat all kinds of food that usually isn't available elsewhere. For clarity, I have lived and studied once in France, and lived, studied and worked in Japan twice. We can talk about the things that made me scream and shout another time (and do let's!), but today I want to talk about food.

It's funny how food and taste memories can remind you of places you have been or people you've met. The first time I was in Japan, I did homestay with a family in Hachioji, Tokyo. My host mother is an amazing cook, and would literally cover the table with different dishes for me to try at dinner time. Every day there was something new to try, and I've said many times how grateful I am to her for making such an effort to show me her country's cuisine. Whenever I taste shiso leaves, or smell sakura-mochi, I remember the evenings we spent eating, drinking tea and talking late into the night. I learned a lot from my host family, but sadly not how to make any of their amazing food. It's not that my host mother wouldn't show me -I just never asked.


Different kinds of beans and sesame seeds on sale in Japan.

When I returned to Japan for work, this time to the Kansai area (much too far to pop round for dinner!), my host mother sent a huge package of food she'd made to my flat. I think she was worried I wouldn't be able to cook for myself. To this day it's one of the most thoughtful gifts anybody has ever given me. Along with a bag of rice, some umeboshi (which she knew I love), packages of home made stew and meat sauce, she'd also packed rice crackers, soy sauce, and confusingly (to me at least), a packet of azuki beans. When I asked her what they were for she said she must have put them in the box by mistake. I thought that was hilarious - mistaken beans - and could just picture her rummaging through her cupboards for things to put in the box. I put the packet on my shelf and forgot about it, because although the beans were beautiful, like shiny little rubies or garnets, I really hadn't a clue what to do with them.

Around this time, I met my friend Katy, and we really hit it off. I lived in an urban area between Osaka and Kobe, and she lived and worked two and a half hours away in Kurodasho, a small village set among sprawling rice paddies and fields. We each thought the other had it better - I lived close to the city and all the convenience that that brings, whereas she had a much larger house, surrounded by lush green. We quickly started a routine of visiting each other on alternate weekends. When she came to my place, we'd eat out at izakayas or noodle bars and sing karaoke all night (and well, I might add. At least on Katy's part!). When I made the journey to see her, she'd usually cook or we would go for okonomiyaki, then sit outside her house by the river drinking beer and talking. (For the record, Katy did have it better - in the Summer we'd see fireflies by the river's edge, and hear the frogs croaking in the rice fields. At my flat, if you went outside, all you got was a view of other people's washing the noise of air conditioners!)

It was Katy who first made this stew, which I think she discovered online, although I can't find the recipe anywhere now - I have it scrawled in my notebook. And for all the lovely food I ate when I was in Japan the second time, it's this relatively simple dish that most reminds me of the whole experience. I ate it all the time; once Katy had made it a few times, I started making it too, and not only used up that bag of azuki beans on the shelf, but had to replace it. From one hour in the kitchen, I would get enough stew for five meals and frequently made a batch on Sunday night to have in my bento at work during the week. I should make clear, it isn't a Japanese recipe at all - it is thick with tomato, warm with paprika, and has parsley dumplings swimming around in it. I don't know who created it (but I do think they were very clever, because I certainly wouldn't ever think to put these flavours together). In Japan, azuki beans are used in sweet foods pretty much exclusively, so my Japanese colleagues were at first surprised that I would make stew with them. But they loved it too, and some took the recipe as well.

I really hope you'll give it a try! It's a chunky, fresh-tasting stew of mushrooms, beans and chopped vegetables. But I do think there are a few important rules to follow if you are to get it right, and these are what they are:

  • Try and use Japanese azuki beans (try your local oriental supermarket); the best ones come from Hokkaido. I've tried using beans from China and I think they taste different.
  • Use shimeji mushrooms, which are also Japanese. I have seen these in Waitrose supermarkets, and I bought the ones in the photo from Cardiff Market (at the stall opposite the fishmonger at the front, if anybody is a local). They have a lovely texture, and buttery flavour (or so I think). Obviously, you can use button mushrooms too.
  • Get everything ready before you start cooking! This doesn't take long, but you don't want to be trying to stir and chop at the same time. Unless you are female and can multi-task.

Azuki Bean Stew

You will need:

100g azuki beans, soaked overnight
50g butter
1 onion, finely chopped
2 cloves garlic, sliced
3 thin leeks, washed and sliced
1 carrot, diced
200g mushrooms, preferably shimeji
1 tbsp paprika
2 tbsp flour
300ml vegetable stock
1 tbsp soy sauce
1 tbsp tomato purée
400g tin chopped tomatoes
salt and pepper
chopped fresh parsley

100g flour
25g butter
2 tbsp dried parsley
3 tbsp milk


  1. Simmer the soaked beans until soft. This should take around 40 minutes, but depends how old your beans are.
  2. In a large pan, cook the onion in the butter until soft, then add the garlic, leeks, carrot and mushrooms. Cook gently for 5 minutes.
  3. Season, and stir in the flour and paprika. Cook for another minute.
  4. Add the stock, soy sauce, tomato paste and tinned tomatoes. Bring to the boil, and simmer gently for ten minutes.
  5. Make the dumplings; rub the butter into the flour until it resembles bread crumbs, then add the parsley. Add milk to bind, and knead to form a soft dough. Form into 8-10 dumplings.
  6. Add the cooked beans to the stew. Return to the boil, then add the dumplings, cover and simmer for 25 minutes, stirring occasionally to stop the stew from sticking to the pan (it will be thick by this point).
  7. Check for seasoning, and serve garnished with fresh parsley.

Wednesday 2 December 2009

Lemon-Vanilla Marmalade


It feels quite strange to be writing in December about something I made back in February, but I suppose that's the good thing about preserves; they keep. I've actually wanted to write about this marmalade for a long time, but decided to wait until it was nearer Christmas, since I made it in the first place with the intention of giving jars away as presents. And apparently, lemons are now in season, though as you can get them all year round, I don't really know what that means.

Just three beautiful ingredients.

It's no secret that I love to make food for other people, be it in regular meal-form, or as gifts like this. But although I like cooking very much (oh so very much!), there are a few things that I have always thought were either a waste of time to make yourself, or troublesome in the extreme to do so. Example of the former: pasta; of the latter: jams and marmalades.

Now, I do accept that anything is worth doing if the process is enjoyable and the results worth the time spent; I am sure that one day I will try making pasta and it will be a complete revelation. I'll probably even spend ages telling you about how wonderfully easy and fantastically delicious it was, and how you should make it too. And maybe you will. But I really, really never thought I'd bother with marmalade. All that faffing about with sterilising jars, using sugar thermometers and setting points - surely only retired old W.I. members had time for that?

Then last year at Christmas, I was given this book and everything changed. This collection of recipes achieves what many would deem impossible; it makes putting things in jars sound exciting. Yes, really. Exciting! And what's more, it shows that not only is sterilising jars easy, but that you don't actually need a sugar thermometer at all. For anything!


Did you ever think that lemon rinds soaking could be so pretty?
No. Of course you didn't. Neither did I.

My enthusiasm must show that I have been converted. I'm not going to go as far as saying that 'putting up' is the new going out (though it is tempting to do so. You must admit, it's a catchy phrase.), but I really do think this is worth making. The vanilla is my own addition. I'm sure it's not an original one, but it makes the marmalade look stunning, flecked as it is with beautiful black grains, and brings an exotic flavour and fragrance to whatever you add it to. I can recommend it not only for the obvious morning slice of toast, but also spooned into hot bowls of rice pudding or to top porridge.

I really recommend it with porridge.

You can see I recycle old jars. So could you!
Lids were bought here.

I have mentioned Pam 'the Jam' Corbin, and her recipes before, when we had the glut of vegetables from Mr. Other P's parents. But I want to mention her again now to say that her book would make a perfect present this Christmas for anybody you know who likes to cook. I have enjoyed reading and using it immensely; I'm sure lots of people would. And if you think (quite wrongly) that marmalade is too much of a faff to make as a present, then it's the next best thing you can give.

Lemon-Vanilla Marmalade

You will need:

1 kg lemons
2 kg granulated sugar
1 vanilla pod, split, seeds scraped out and reserved

  • Top and tail the lemons. In other words, cut the bumps off the ends! Juice them, and then slice the rinds as thinly or thickly as you like. I think thinly is better, but will allow you the freedom to choose.
  • Put the juice, rinds and 2.5 litres of water into a large bowl, and leave to soak overnight. I don't know if you really need to do this, but Pam says to and she knows better than me.
  • Transfer the lemon mixture to a large (LARGE!) pan, and cook gently for a few hours until the lemon rind is soft. The liquid will have reduced by about a third.
  • Add the sugar. Boil, and stir until the sugar has dissolved. Then boil rapidly until the setting point (* see note) has been reached. This took about 40 minutes for me, though start checking at 20.
  • Turn off the heat. Stir through the vanilla seeds, and pour into hot, sterilised jars (* see note). Seal immediately. Use within 2 years.
NB: To check for setting point: when you start boiling the jam, put a saucer in the freezer to chill. After boiling for the required time, drop small dribbles of the jam onto the saucer and wait a moment. If, when you poke the puddle of jam with your finger, the surface forms a wrinkle, the setting point has been reached.

To sterilise jars, see here.

Christmas Cake Recipe


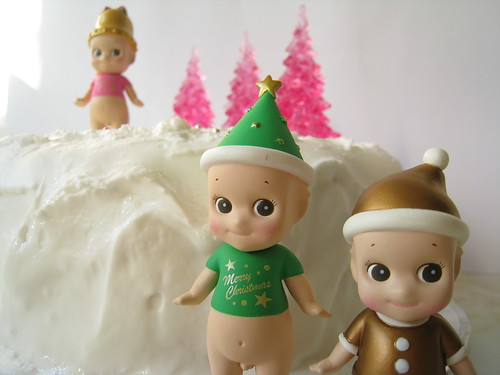
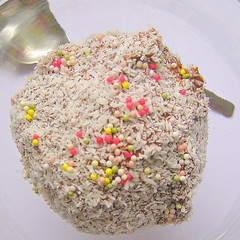
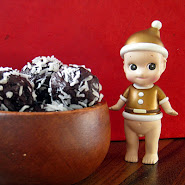
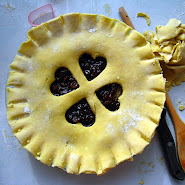
A few well-placed hearts have saved my Christmas cake decorations' modesty. Crazy, aren't they? I bought them in Japan last year, and have no idea why they are naked from the waste down. All I know is that they are part of a range of collectible figures called Sonny Angels, and trust me, make amazing-looking cake toppers. Since I didn't take any photos of the making of this cake, I thought I would at least show you what I plan to put on it. Kitsch in the extreme, I think you'll agree.

Several people commented that I should have included the recipe for my Christmas cake in my last post (about how good it smelled as it cooked). It's true that I was not exactly inundated with requests, but still, I was really happy to see that some of you wanted to know. I suppose I thought that most people would have their own recipe to follow anyway, as these things are usually passed down through the generations of different families, so nobody would have wanted mine.

Reading my last post back though, I see I should have included it; writing a paragraph that basically says 'I have just made a cake that smells absolutely incredible and I'm not going to tell you how to make it, so there' is hardly what you would call community spirit, is it?

Anyway, this is not a family recipe. My mum does in fact make the best Christmas cake in the world, even though she would tell you she doesn't. This has to do with the fact that her Christmas cakes always crumble when you cut into them. Personally, I LOVE fruit cakes with a texture like that though, and have a feeling the she only ever says that she doesn't to draw attention to the fact that what she's made is as good as it gets in terms of fruit cake. I really must get a copy of her recipe actually. (And readers - if you have a family recipe, leave a link. I'd love to see.)

I usually make several Christmas cakes, because my mum doesn't always have the time to bake one, and I like to have one at my house, too. And I usually follow a Nigella Lawson recipe which makes enough mixture for two cakes in the tins I have. This year I haven't, because Mum has made one, and I can't scale down Nigella's recipe to fit into just one tin. I've tried once before, and although it was delicious, it didn't cut it in the height department; nobody wants a short, flat Christmas cake. Nobody.

So, not wanting a shed-load of extra cake mixture on my hands I did a spot of light research. Well, research of a sort - I read my cookbooks, and Googled. It seems that actually, most fruit cakes follow a similar proportion of the usual suspects - flour, butter, sugar and eggs - to regular cake. Then you just add lots whatever dried fruit you have to hand. And I mean lots; I think there should be so much fruit that you feel as though your arm will break from stirring the mixture. It's the season of excess after all.

I was in a rush this year, so just went to my local spice merchant (I don't know what else to call him!) and bulk bought whatever I fancied. This included a 1 lb bag of mixed vine fruit, some dried cranberries, ready-to-eat prunes and absolutely no glacé cherries, because they are disgusting. I didn't get any candied peel, although he does sell the good stuff, because I bought some a few months ago (along with a chunk of candied pumpkin - I didn't even know you could buy that, and was suitably ecstatic) from a little place I know of in Rome. I soaked it all overnight in whiskey (no brandy, you see), and used a four-egg cake mixture.

You should know by the way, that even though I am writing this almost a week after baking my cake, it isn't too late to make yours if you haven't yet. Provided you do it two weeks before Christmas you'll be fine. And make one you should - nothing says Christmas better than a home made cake, and even someone who has never baked anything except potatoes before and has no fancy kitchen equipment can do this standing on their head.

The Delicious Delicious Delicious Christmas Cake Recipe

You will need:

450g assorted dried vine fruit (mine included raisins, currants and sultanas)
200g dried cranberries (I used a pack of Ocean Spray 'Craisins' - I can't remember the weight exactly)
150g ready-to-eat prunes, each cut into three or four pieces
150g finely chopped candied peel and/or candied pumpkin
150ml whiskey

250g butter, softened
250g dark muscovado sugar
250g plain flour
4 eggs
a pinch of salt
1 tsp ground cinnamon
1 tsp ground allspice
1/2 tsp ground ginger
1/2 tsp ground cloves
1/2 tsp freshly grated nutmeg
2 tbsp marmalade
grated zest of an orange and a lemon

  1. The night before you make the cake (or several days before - it doesn't matter), put all of the dried fruit in a bowl, and pour over the whisky. Mix well, and cover.
  2. Prepare the cake tin (I used a deep 20cm round one); line with baking parchment, and tie a folded piece of brown paper around the outside with string. Apparently this helps stop the cake from burning at the edges. It won't burn in the oven though, don't worry! Pre-heat the oven to 140°C.
  3. Make the cake mixture in the usual way; cream the butter and sugar, add the eggs one at a time and then fold in the flour. Use a wooden spoon for this cake - Christmas is one of those times when it feels good to be traditional.
  4. Add the rest of the cake ingredients, stir very well, and then fold in the fruit mixture. Make sure to add every last drop of the whiskey the fruit was soaked in. It will be a very heavy, fruit-filled mixture. Taste it. Is it not delicious?
  5. Transfer to the prepared tin, and bake for about 3 1/2 to 4 hours. It is ready when a skewer or cocktail stick pushed into the middle of the cake comes out clean.
  6. Cool in the tin, on a wire rack overnight.
  7. Next morning, feed the cake (make holes in the top with a skewer and pour over some more whiskey), and then wrap in baking parchment and foil. Keep in a tin until Christmas.
  8. Ice and decorate as you wish. Check back to see mine!
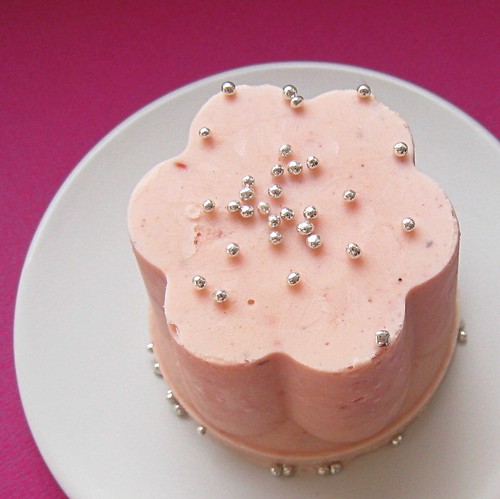
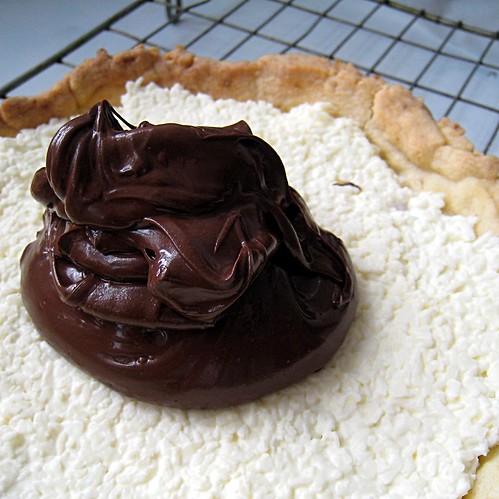
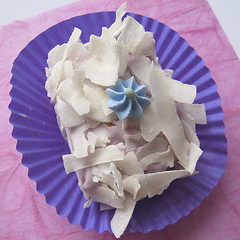
Related Posts with Thumbnails